
Advising Appointments

Academic advising appointments can now be made via Stellic's Appointment feature. Advisors can connect their Outlook calendar and create "Time blocks" of availability for advising appointments. Students select the time and date that works best and make their advising appointment.

 Quick links to training topics:


Calendar Connection

Before you can start accepting student initiated appointments you must connect your Outlook calendar to Stellic.

Calendar integration allows Stellic to:

  • Check your existing calendar events to prevent appointment conflicts
  • Automatically add new Stellic appointments to your calendar

Setup Instructions:

Click on Appointments from the menu
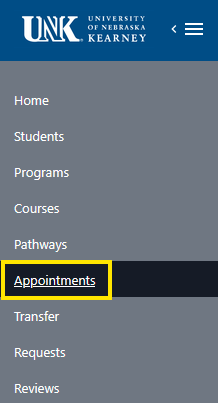
navigation menu for University of Nebraska at Kearney, showing the “Appointments” link highlighted.

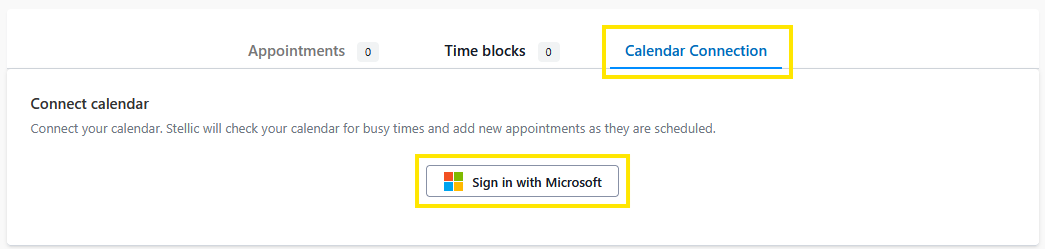
Click the Connect Calendar

Calendar Connection setup screen showing the "Connect calendar" section with a "Sign in with Microsoft" button highlighted.

Sign in to outlook with your UNK credentials when prompted

Review the permission request for Stellic to:

  • View and edit events on your calendars

  • See the calendars you have subscribed to

Click Authorize to grant permissions

To Configure Calendar Settings

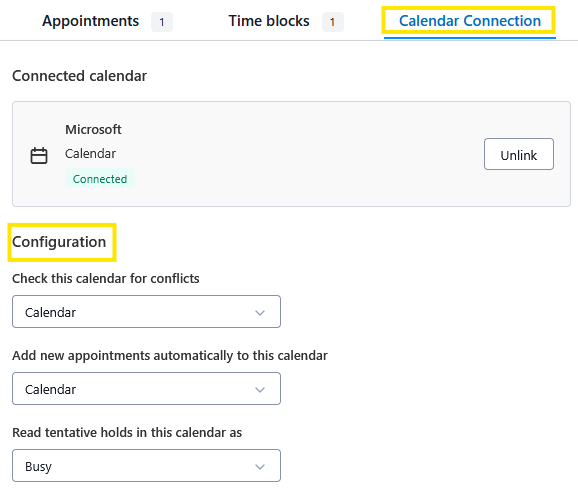
Click Calendar Connection

  • Under Configuration, you can check your calendar for conflicts


Screenshot of a Calendar Connection settings page showing a connected Microsoft Calendar and configuration dropdowns for conflict checks, adding appointments, and tentative hold status.


Time Blocks

To use appointment scheduling in Stellic, you'll need to create and activate at least one time block. A time block defines the rules and availability for appointments that can be scheduled. Students can only schedule appointments with advisors who meet two criteria:

  • The advisor has permission to view that student within Stellic

  • The advisor has created and activated a time block that overlaps with the student's availability

Creating a Time block

Click the Appointments tab from the menu and click Create Time Block.Scheduling dashboard header showing tabs for Appointments, Time blocks (selected), and Calendar Connection, with a "Create Time Block" button on the right.

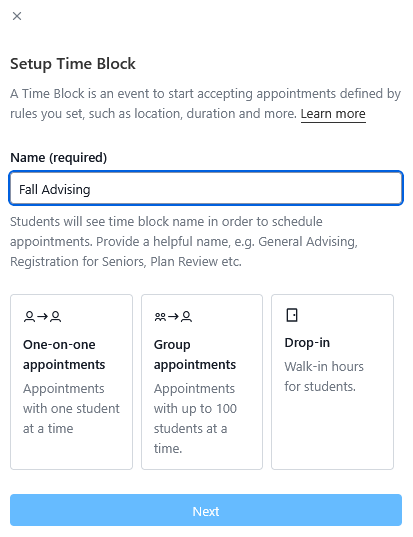
Provide a name for the time block. Students will see the time block name in order to schedule an appointment. 

Setup Time Block form with the name field filled as “Fall Advising” and three appointment type options: one-on-one, group, and drop-in, with a Next button at the bottom.

Select an appointment type. For advising, select One-on-one appointments.Scheduling page for a Fall Advising appointment time block showing tabs (Overview, Editor selected, Appointments) with an Activate button in the top right.

Appointment Editor will allow you to set the Time Block DetailsScreenshot of a “Time Block Details” form for appointment scheduling, with fields for event type, date range, location (in-person/phone/video), office location and phone number, purpose, duration, and
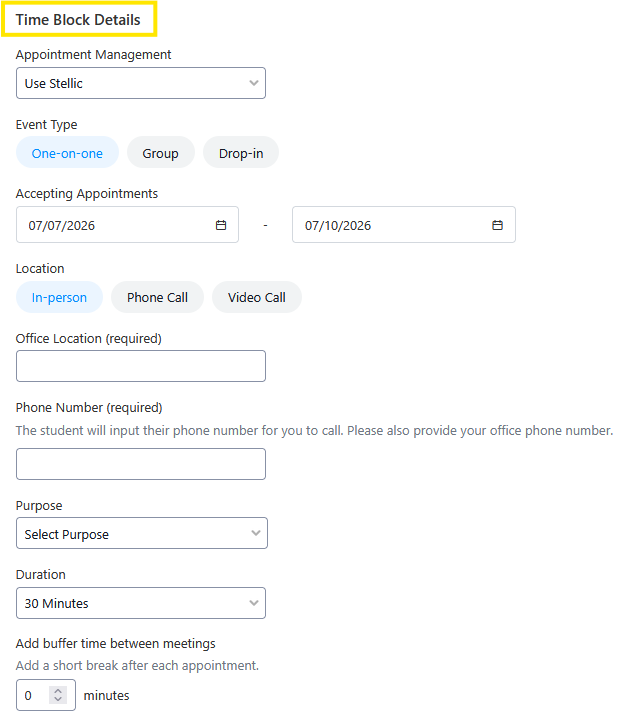
Event Type: Here is another opportunity to modify appointment type from One-on-one to group or drop-in.

Accepting Appointments: Select the date range for the time block period

Office Location: For in person appointments, designate meeting location. For Phone call enter in your office phone number. For Video Call enter in the URL for meeting, such as a Zoom or Microsoft Teams link

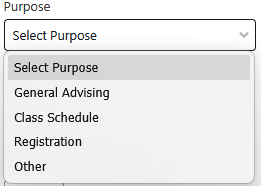
Purpose: Select the appropriate option.

Open dropdown menu labeled “Purpose” showing options: Select Purpose, General Advising, Class Schedule, Registration, and Other.Duration: 15, 30, 45, 60 minute options
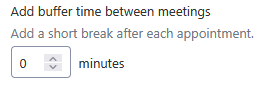
Buffer Time: Add a short break after each appointment. This is optional.

Form setting labeled “Add buffer time between meetings” with a minutes input box set to 0 and helper text “Add a short break after each appointment.”.Hosts and Invitees:

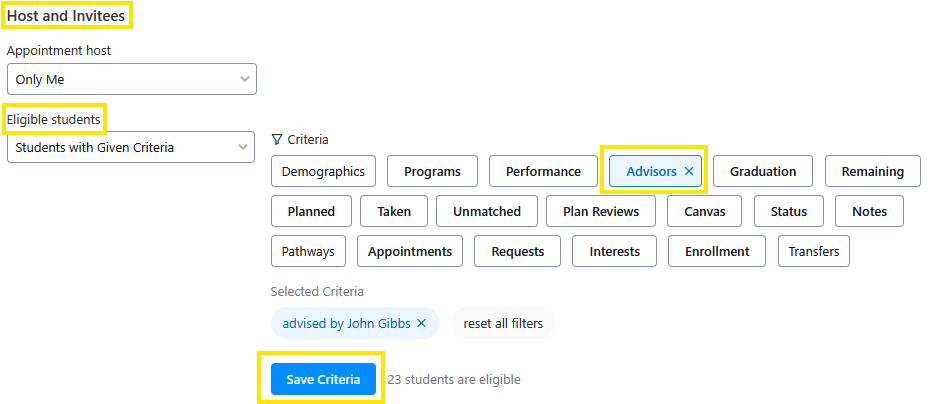
  • Appointment host, Only Me refers to the advisor. 
  • Eligible students
    • Select students option allows you to paste student names or NUID separated by space, semicolon, new line or tab. 
    • Students with Given Criteria lets you select students from the student search. The most efficient method is to use the Advisors filter and enter your name. All of the students you advise will be listed.

Host and Invitees settings screen showing appointment host set to “Only Me,” eligible students filtered by criteria with the “Advisors” filter selected (advised by John Gibbs), and a Save Criteria按钮.

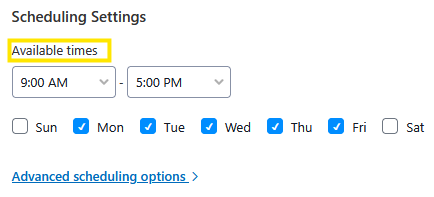
Scheduling Settings: Select available times and dates for the time block

Screenshot of Scheduling Settings showing an “Available times” section with start and end time dropdowns and weekday checkboxes for selecting which days are available.

Advanced Scheduling options provides more options that include start time increments, date range where invitees can see availability, maximum allowed appointments per day, and more.

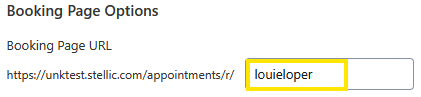
Booking Page: Create a user-friendly URL to make sharing your scheduling link easier. This is optional.

Booking Page Options screen showing a Booking Page URL with an editable text field highlighted containing "louieloper".

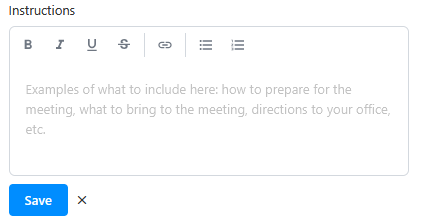
Instructions: Optional, items could include how to prepare for the meeting, what to bring with, directions to your office etc.

Text editor labeled “Instructions” with formatting toolbar, a placeholder note about what to include, and a “Save” button below.

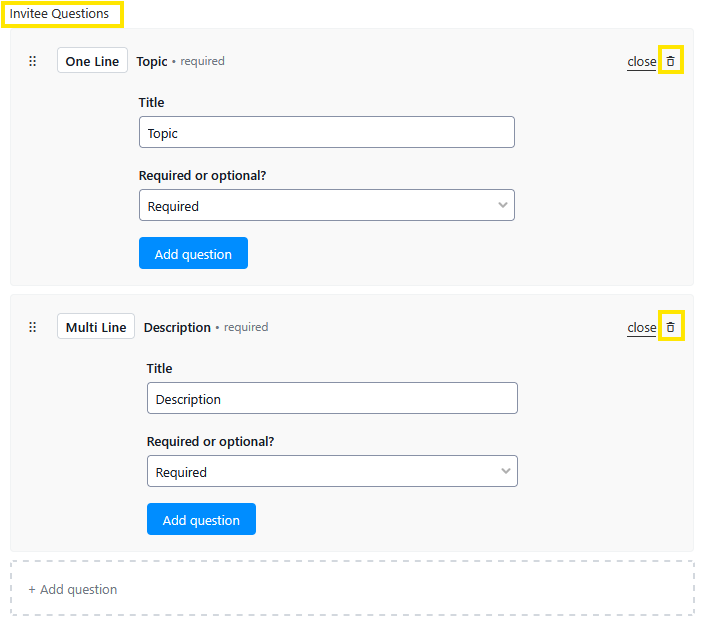
Invitee Questions: Optional questions for the student to answer when they make their appointments. If you do not need questions, click on the trashcan icon to remove the question. If you would like questions, fill out the title and select if the question is optional or required by the student to answer.

Screenshot of an “Invitee Questions” form builder showing editable one-line “Topic” and multi-line “Description” fields, each marked required, with Add question buttons and close/delete icons.

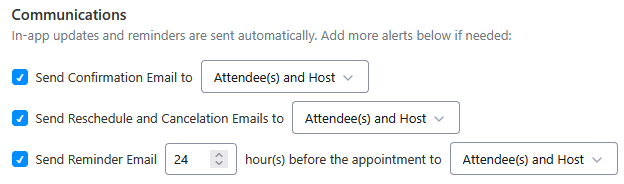
Communications: In-app updates and reminders are sent automatically. Add more alerts if needed

  • Send Confirmation Email to Host/Attendee/Both
  • Send reschedule and cancelation emails to Host/Attendee/Both
  • Send reminder email X amount of hours before the appointment to Host/Attendee/Both

Communications settings panel with checked options to send confirmation, reschedule/cancelation, and reminder emails to attendee(s) and host, including a reminder set to 24 hours before the meeting.


Manage Appointments

Managing existing appointments: You can manage existing appointments by scrolling to the "Upcoming Appointments" section of the "Appointments" tab. Here, you can view all upcoming appointments, or use the filters to only see appointments within a specific date range, appointment location, and more.
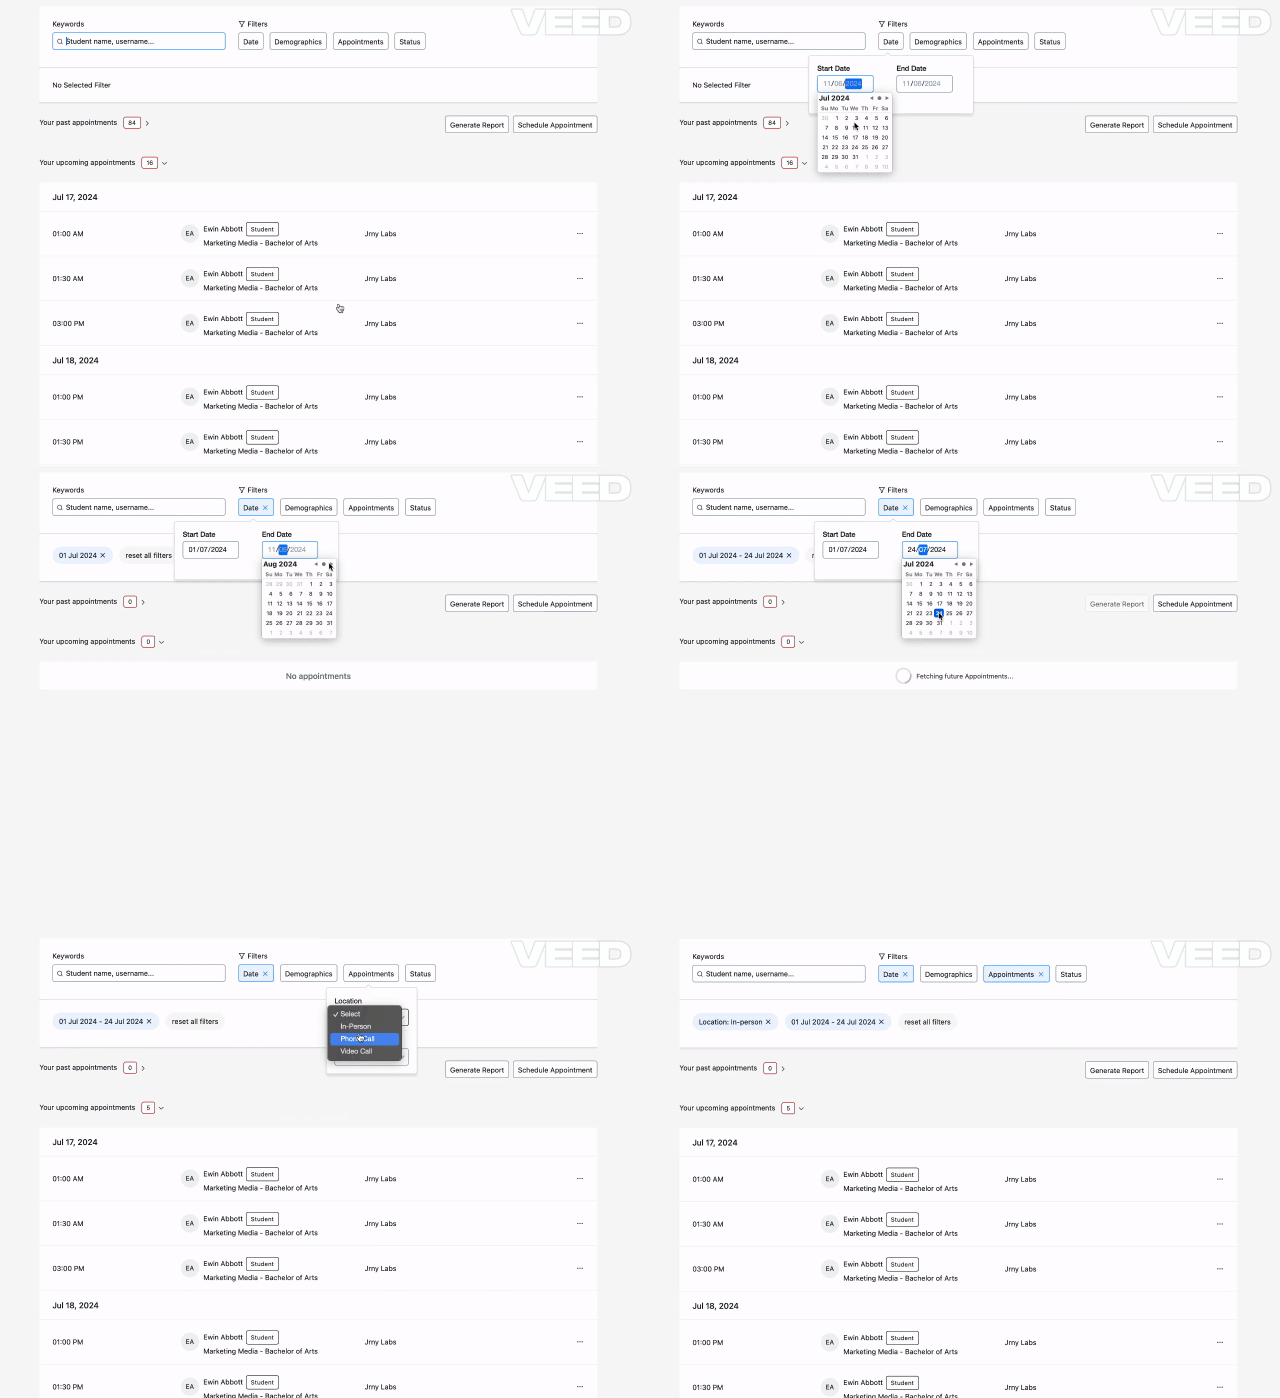
Appointments dashboard with a keyword search, filter buttons (Date, Demographics, Appointments, Status), and a list of upcoming and past appointments grouped by date and time.

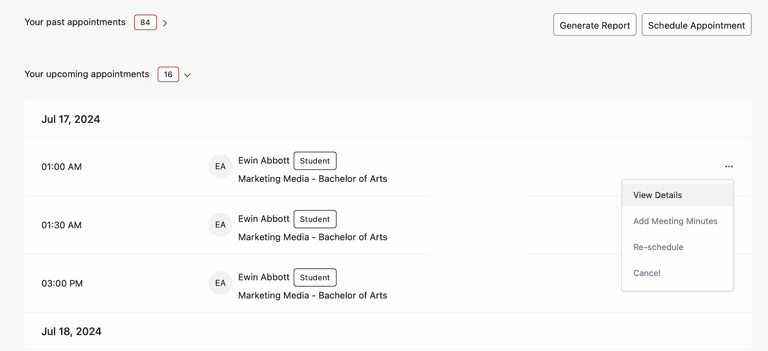
You can cancel, re-schedule, or add a note to an upcoming appointment by clicking on the 3-dot menu on the right side of the appointment. Any notes that you add to the appointment will be recorded in the notes in the student's Stellic profile.

Appointments dashboard showing a list of upcoming student meetings for Jul 17, 2024, with a three-dot menu open (View Details, Add Meeting Minutes, Re-schedule, Cancel) and buttons for Generate Report

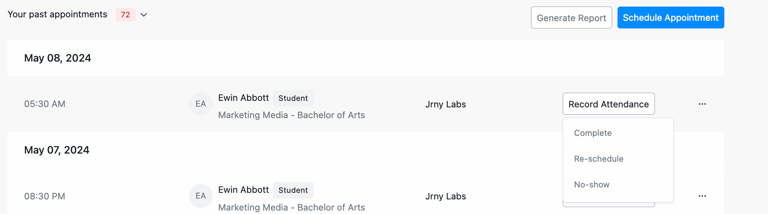
Managing Past Appointments:Once an appointment's date and time has lapsed, you can record the student's meeting attendance to be either "No Show" or "Completed". You also have the option to re-schedule the meeting, even after the date and time have passed.Dashboard list of past appointments by date, showing entries for a student and a “Record Attendance” menu with options Complete, Re-schedule, and No-show.
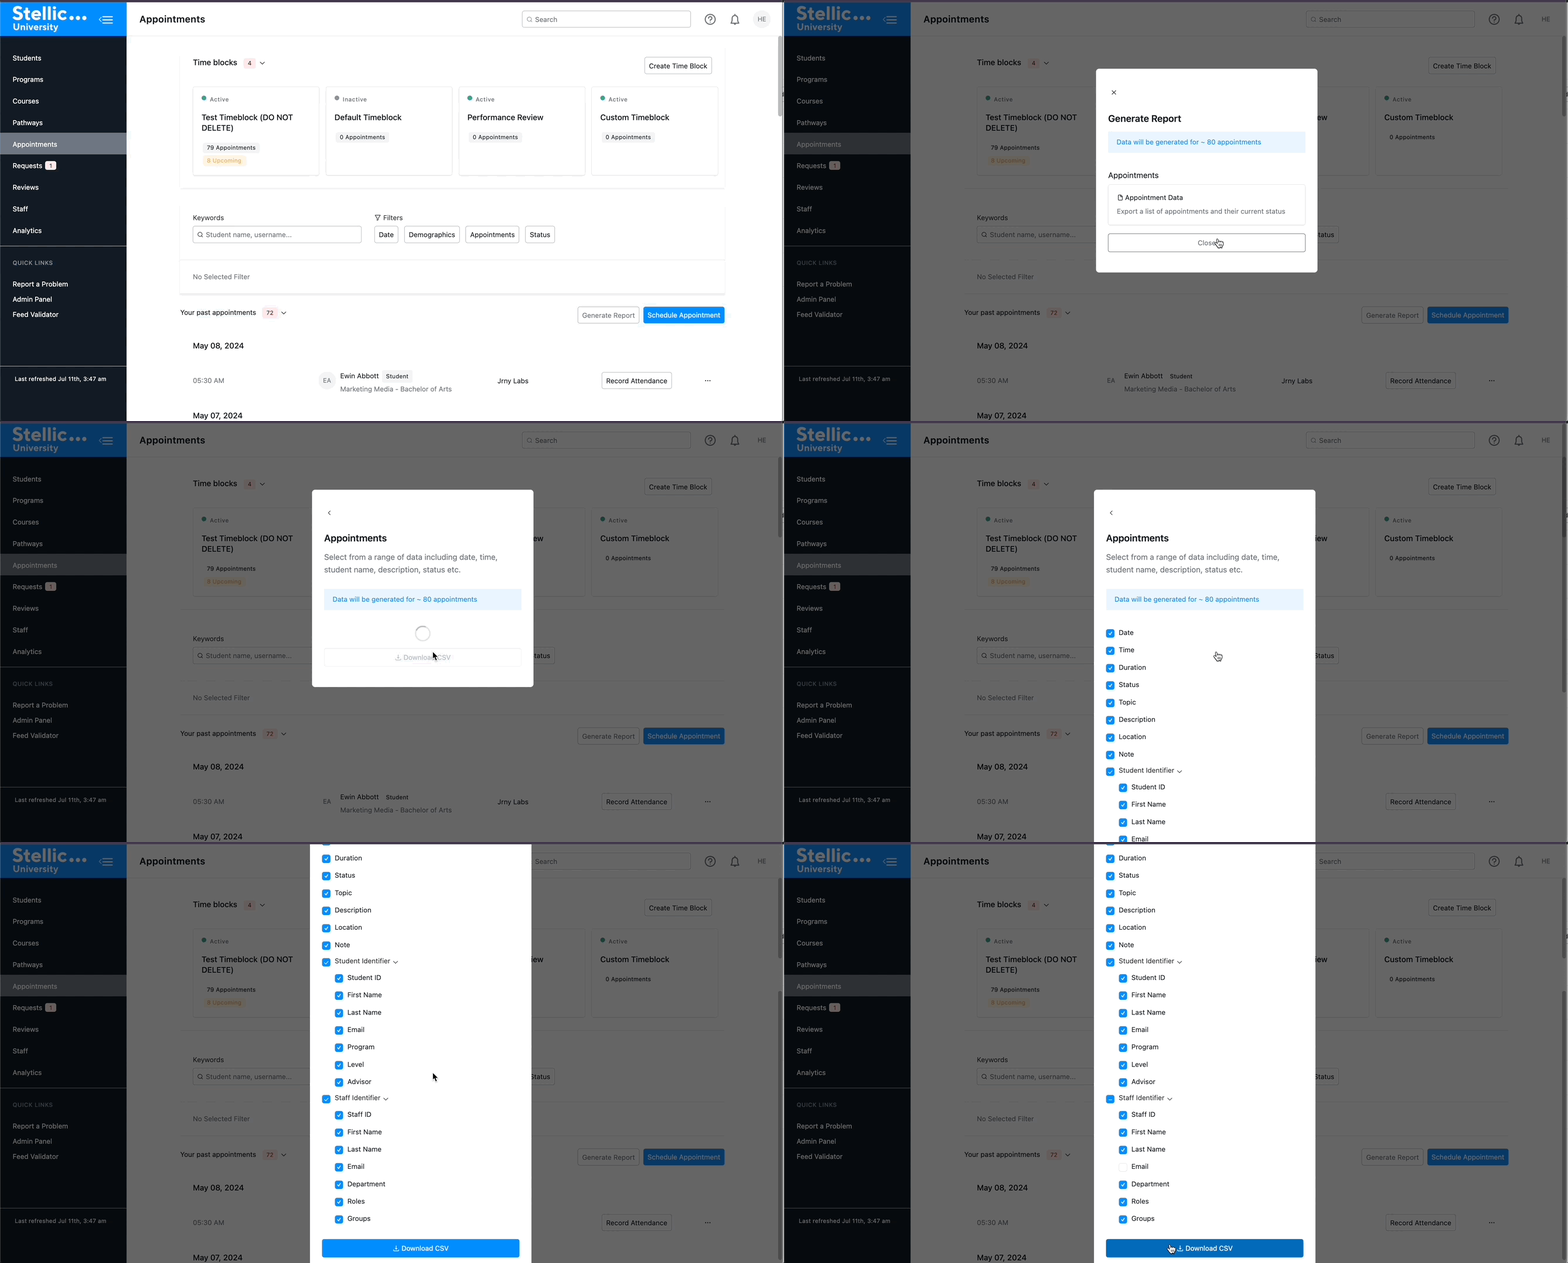
Appointment Reporting: You can export your appointment information into a CSV by clicking Generate Report and then identifying which columns you'd like included in the CSV download.Stellic University Appointments dashboard showing time block cards (Test Timeblock, Default Timeblock, Performance Review, Custom Timeblock) with appointment counts, plus filters and a past-appoint­m­
Meeting Notes:

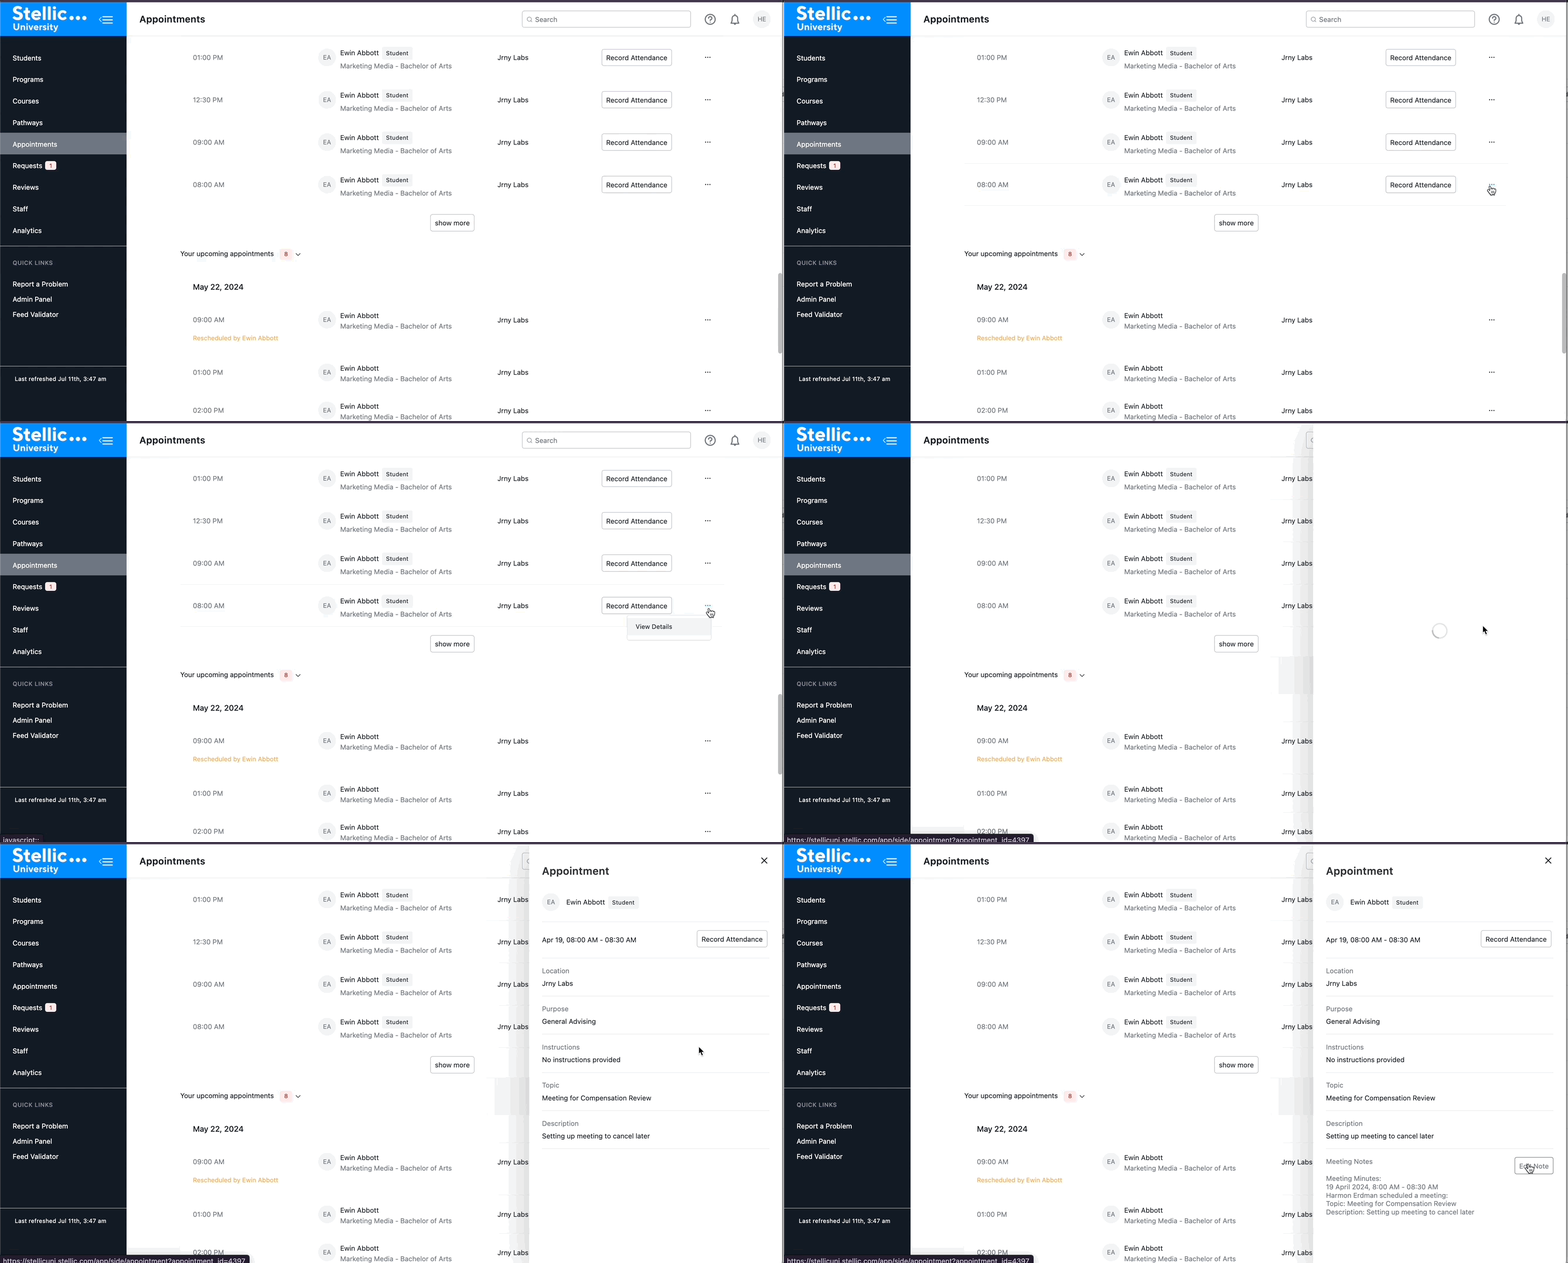
Auto-generated notes are made to record basic meeting details. These automated notes will appear on the student's record whether the student initiates the appointment or the advisor does.

Advisors can add notes separately for each scheduled appointment. Notes can be added directly within the Appointments tab. Notes will display on the student profile, based on the date the appointment was scheduled. Appointments dashboard for Stellic University showing a list of student appointments with times, student name, program, location, and “Record Attendance” buttons.