Stellic Course Registration
Course registration is coming to Stellic for the Spring 2027 semester. At this time Stellic and MyBlue can both be used for student course registration.
-
Course registration functions best when students have courses and sections added to their student plan prior to registration.
-
The registration process starts with the Student Plan, then the Scheduler organizes course selections and sections into a calendar view providing students a full picture of their semester. When the student is ready, from the Scheduler they can complete course registration.
Student Plan → Scheduler → Registration
For Registration support please contact unkstellic@unk.edu or unkregistrar@unk.edu
Quick links to topics found on this page:
Registration Access
When a student's registration time is open link will display and they can access registration from the Student Plan (Plan your Path) or Home.
Access Registration from Student Plan:
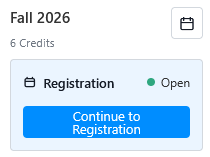
Access Registration from the student's Home:

Registration Readiness
- The heading at the top of the scheduler indicates course readiness. Items such as holds, checklist items and enrollment deadlines will be displayed in the top heading of the Primary Plan.

- Items in the header are clickable and offer the specific details of any holds or course items to resolve, such as time conflicts, requisites etc.
- The blue "Courses Ready" indicates the student can begin registration. The Checklist Complete button indicates when the student completed checklist items, such as the Enrollment Disclaimer.
- Note: Any other hold items like permits and overload requests will need to be processed in MyBlue.
Scheduler
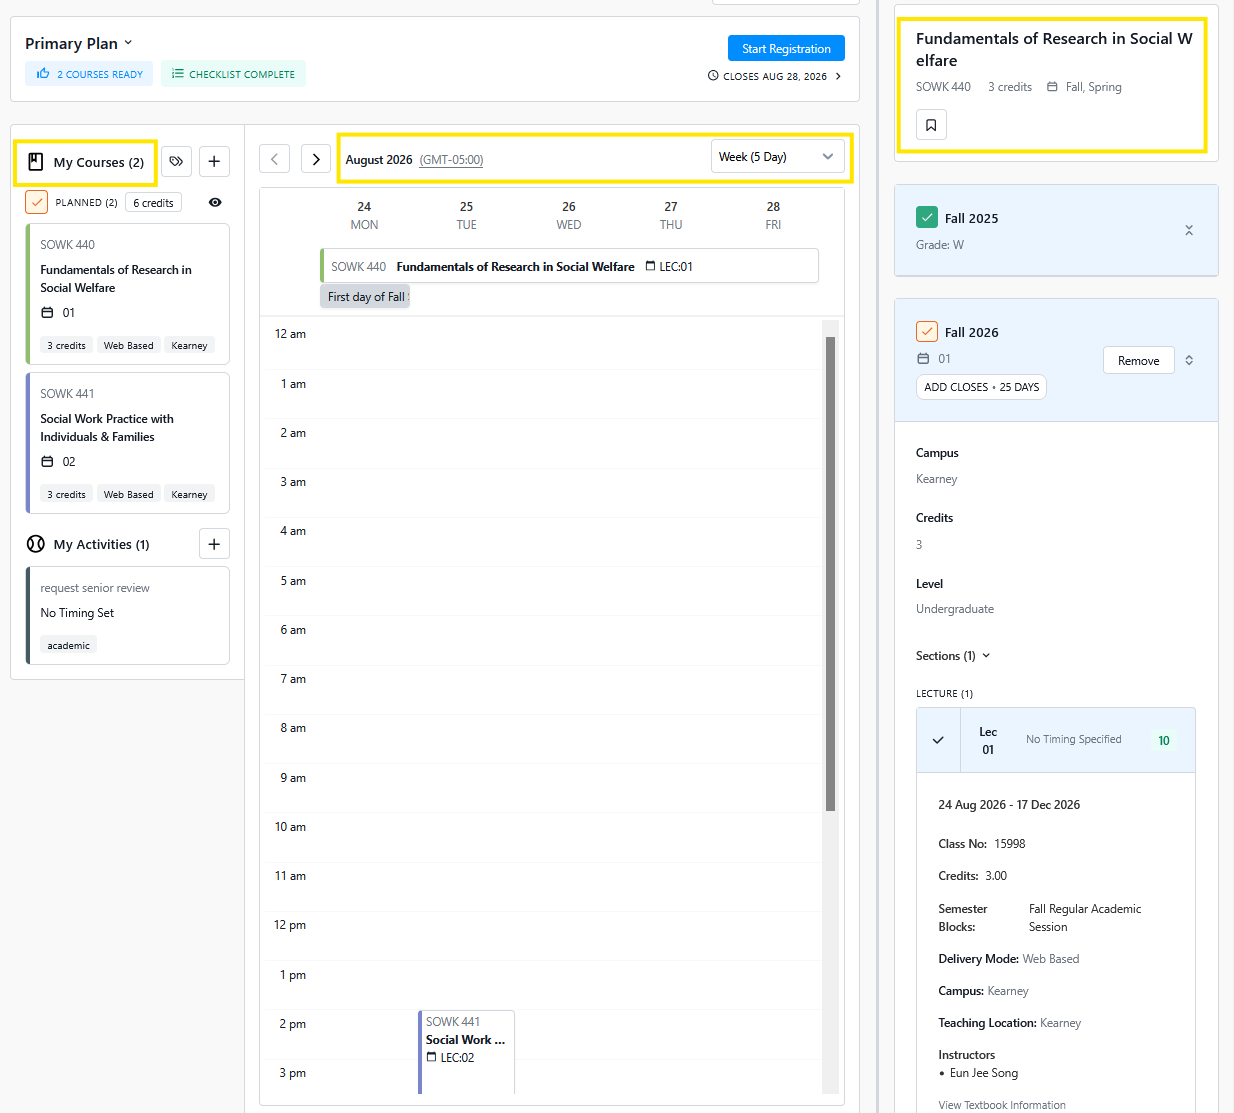
The scheduler provides an at a glance look at planned courses in a calendar view.
- Left panel: planned courses for the term, organized by enrollment status (Enrolled, Waitlisted, or Planned)
- Center: weekly calendar view, with online and asynchronous courses displayed across the top
- Right panel: Section details, course search filters
Viewing options: The schedule can be viewed weekly by courses laid out by day and time. Or semester view, when all your courses occur across the semester without specific dates.
By default, only enrolled classes are visible on the calendar view. Toggle waitlisted or planned courses to display them as well.
Example:
Add Activities & Commitments
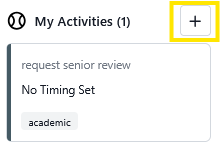
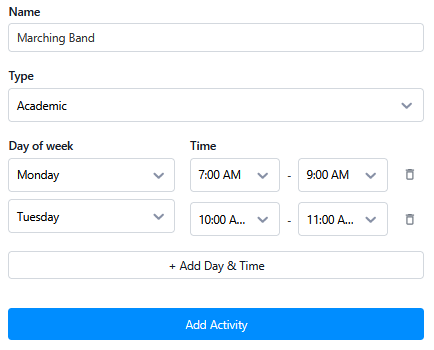
- Students can add activities such as work, volunteering, practice, or other recurring activities to be included in the schedule.
- Click and drag on an open time slot in the calendar
- Select Add Activity
- Name it and set the times
- Click Save
- The students’ activities now appear on your schedule, helping avoid conflicts.
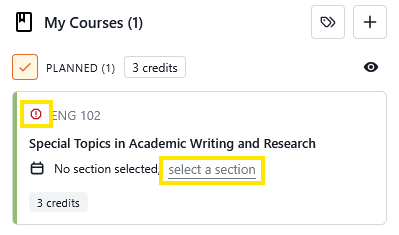
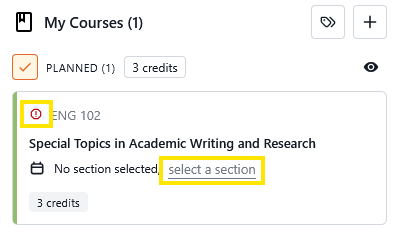
- If courses that were placed in the Student Plan do not have a section selected, in the scheduler an alert icon will be displayed instructing you to pick a specific section
Example of course section selection:
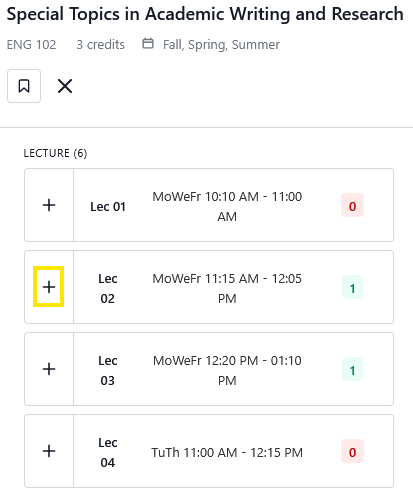
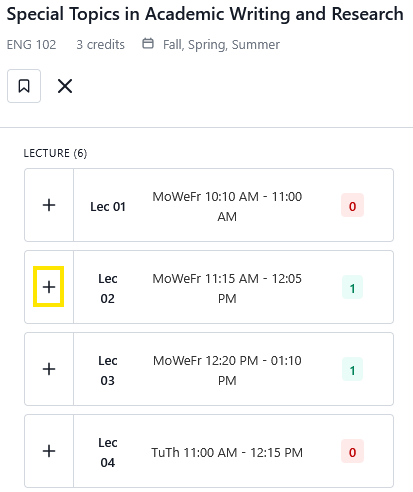
- Click on “Select a section” the sidebar will display to the right. From there the student can review the available sections and meeting times that work best for them. Clicking the plus + icon to select the specific section.
- Adding courses to the Scheduler will by default, add them to the student’s student plan.
Example of Course Section Selection:
Schedule Generator
- Add additional tool to help students plan and evaluate possible course schedules is by using the Schedule Generator. The generator works by setting must have and nice to have preferences and generates multiple course schedule options that students and advisors can review and select the best option that works best for the student.
- The Schedule Generator will work just the same if course sections have been picked out in the student plan or if sections have not been yet selected. This tool organizes that data bases on student preference.
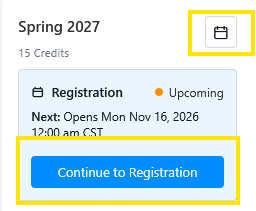
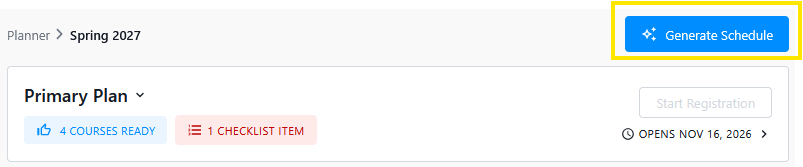
- The Schedule Generator can be accessed in two places and will bring you to the Scheduler.
- From a Student Plan, click on the Calendar icon in the top right of a semester tile
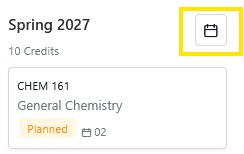
- During course registration the Continue To Registration will also bring you to the scheduler.
Schedule Preferences
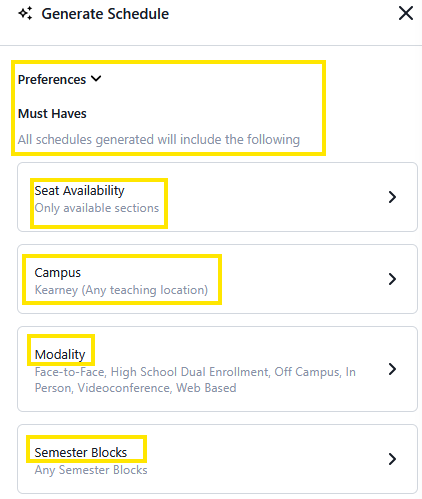
Select options from the optional Must Haves:
- Seat Availability: Generate sections with only open seats, or all sections
- Campus: Kearney is the only option
- Modality: Face to Face, In person, Web Based ETC
- Semester Blocks: Any, mini sessions, regular academic session etc
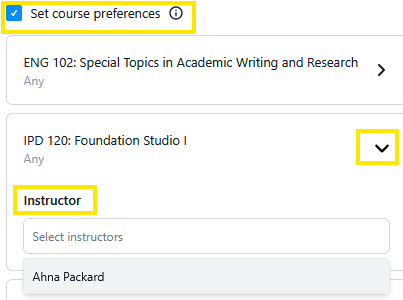
Set Course Presences, these options will allow the student to set proffered course instructor for each course in the Plan.
Nice to Have Preferences
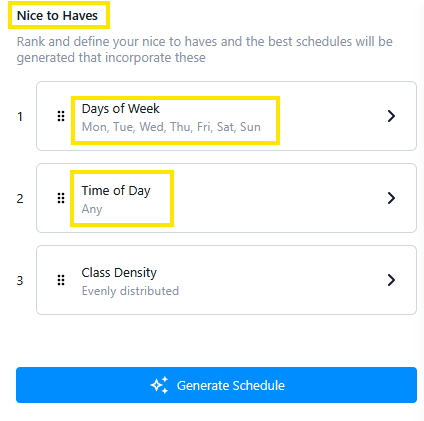
- Select preferences for days of the week and time of day the course is offered.
Click on Generate Schedule and review up to 5 schedule options. Hovering over each option will display on the calendar view the meeting times and days. Click on the Schedule and apply it to the Planned courses.
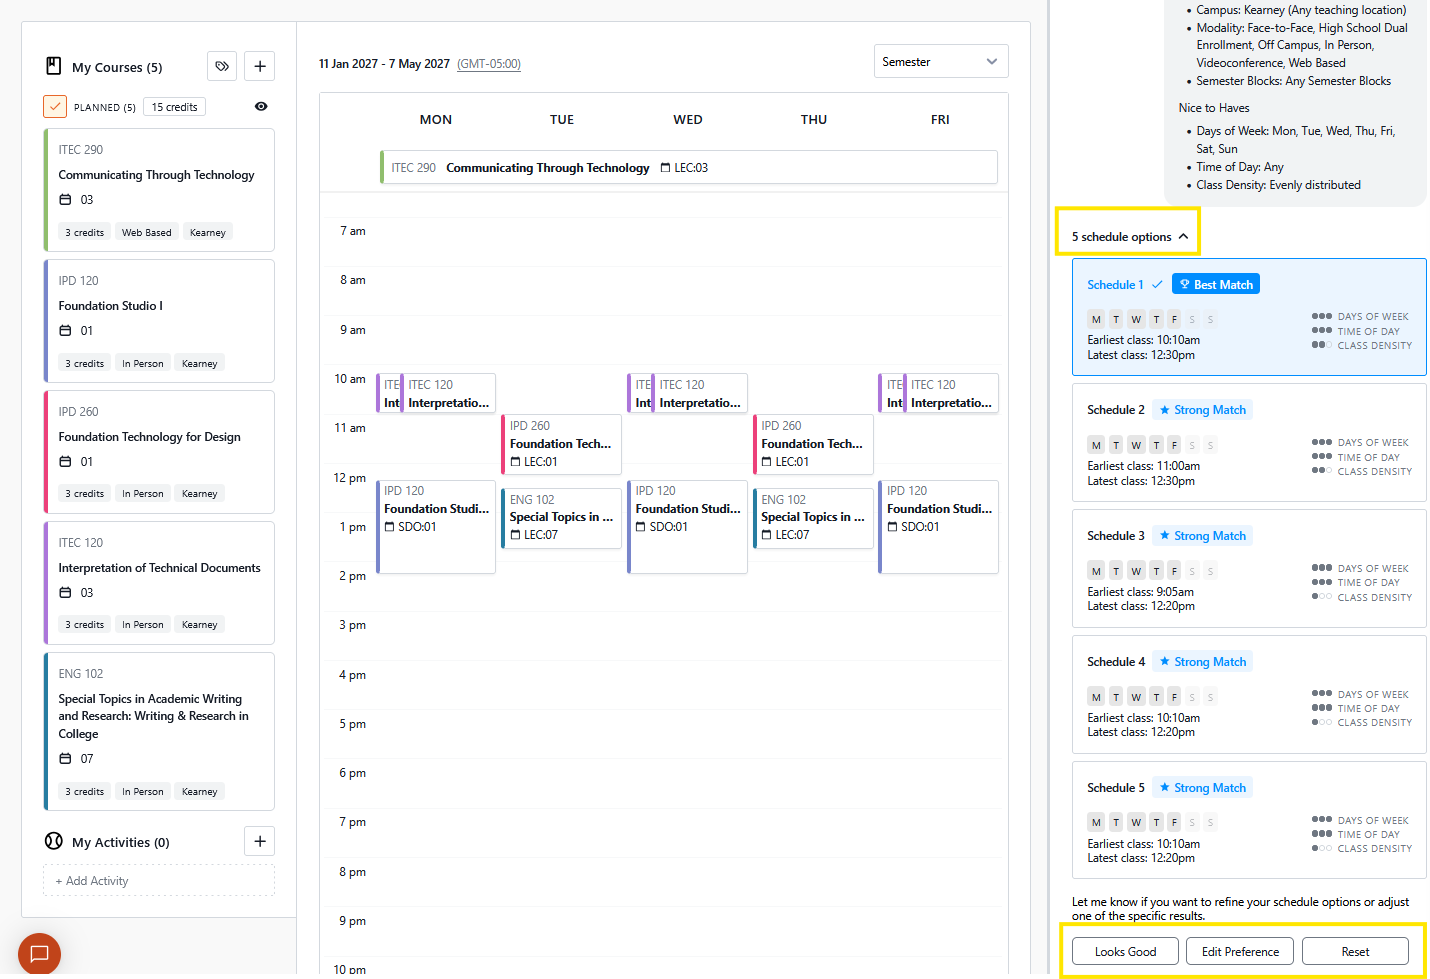
If you would like to refine or reset the Must Have and Nice to Haves, click the buttons at the bottom of the generated list of courses.
Registration Steps
With Courses in a Student Plan
- From the student Home or Scheduler pages Student’s will click “Start Registration”
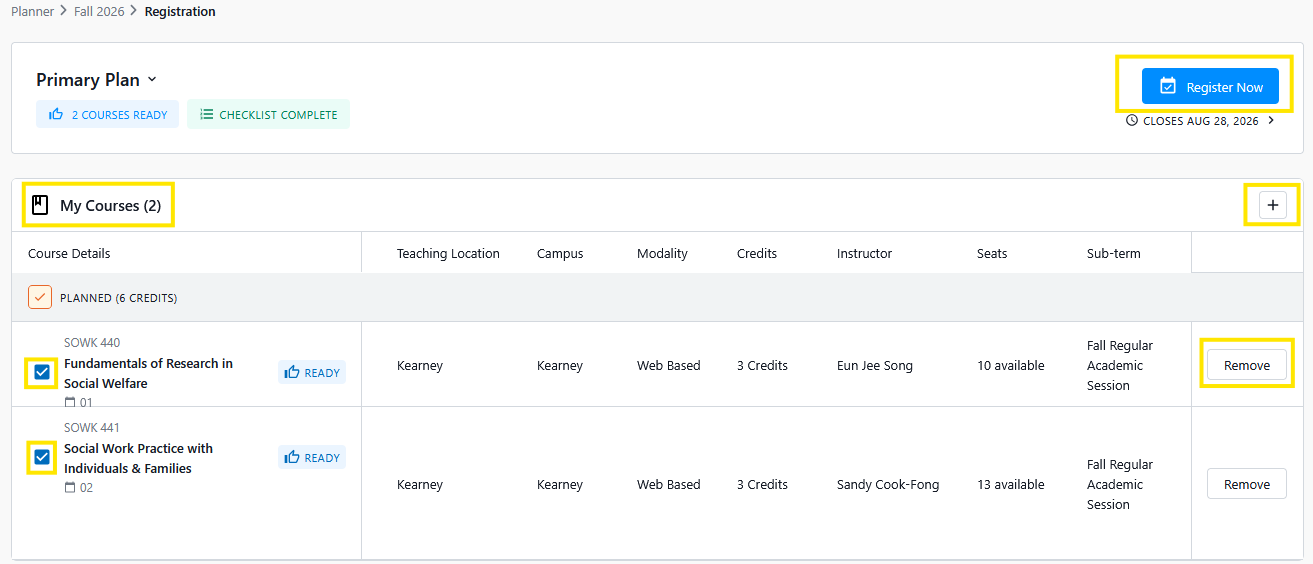
- The Registration page will display course details in the “My Courses” section. Here the student can review, class number, timing, dates, room, building, teaching location, campus, modality, credits, instructor, seats and sub-term. If they need to remove a course, scroll all the way to the left and click the “Remove” button.
- A course can also be added from this page by clicking on the plus + icon in the top right corner of the My Courses section.
- To enroll in the selected courses, click the blue “Register Now” button.
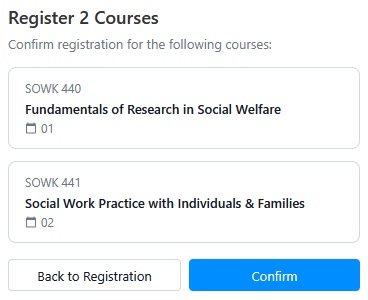
- A confrontation window will appear, click “Confirm” to complete the process.
Example Registration Page:
Registration Confirmation:
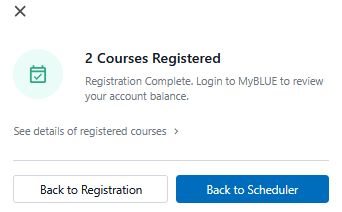
- Registration Confirmation A student can check their student plan for that semester and courses enrolled will be identified as such. Also the Student Home dashboard will indicate courses registered for. Additionally MyBlue will indicate courses registered for.
Dropping Courses
After a course has been enrolled, students can drop courses from either the Scheduler or the Enrollment window.
- From the Enrollment window, Click on the Actions button and select Drop Course
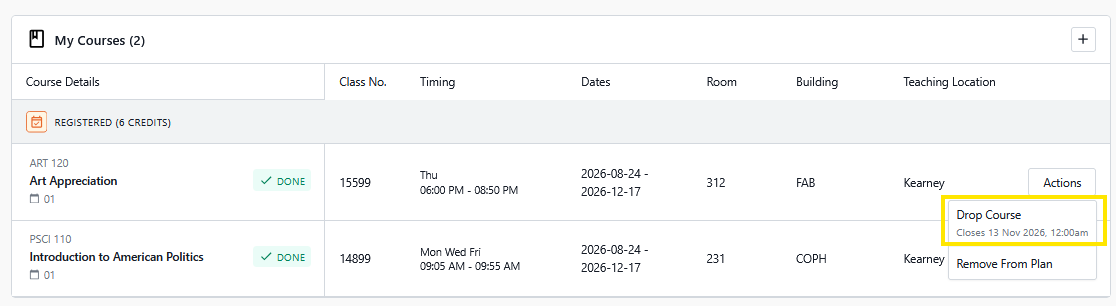
- From the Scheduler, Click on the course and in the sidebar of the course details, click on the Actions button and select Drop Course
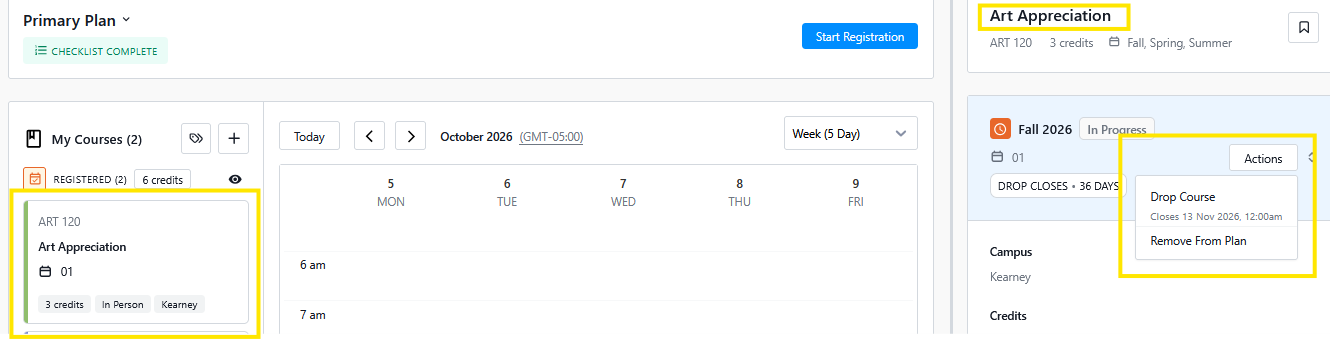
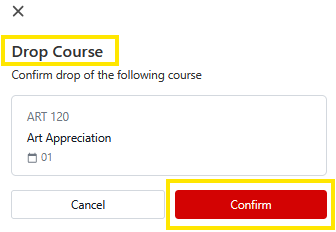
- Drop Course Confirmations message will appear
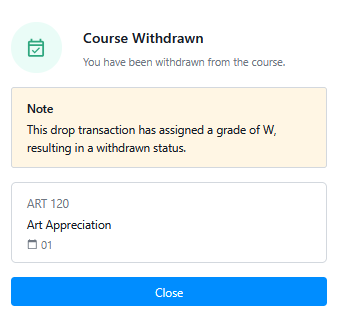 Once course has been withdrawn, in the Student Plan, Scheduler and Enrollment Window a section for Withdrawn courses will be displayed.
Registration Steps
Students with no Courses in Student Plan
Home → Scheduler → Registration
- Students can register for courses without the student plan. The student will access the Scheduler and Registration pages from Home or “Schedule Semester year (Spring 2027) from the lefthand navigation menu. Either of these links will load the Scheduler.
- If the specific course is known, click on the plus + icon in the top right corner the My Courses section to add course by course code and number.
Example of manual Course add:
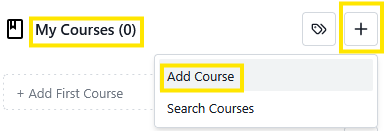
Type in specific course name and number, example ENG 102
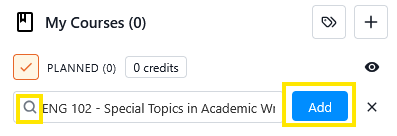
- If clicking on the “+ Add First Course” button instead, the Course Search function will display. Using the Course Search allows the search filters to be utilized.
- Once added, the course will appear in the “My Courses” in the Scheduler. Before enrollment can happen, the course section needs to be selected.
- Click on “Select a section” the sidebar will display to the right. From there the student can review the available sections and meeting times that work best for them. Click the plus + icon to select the specific section.
Example of Course Section Selection:
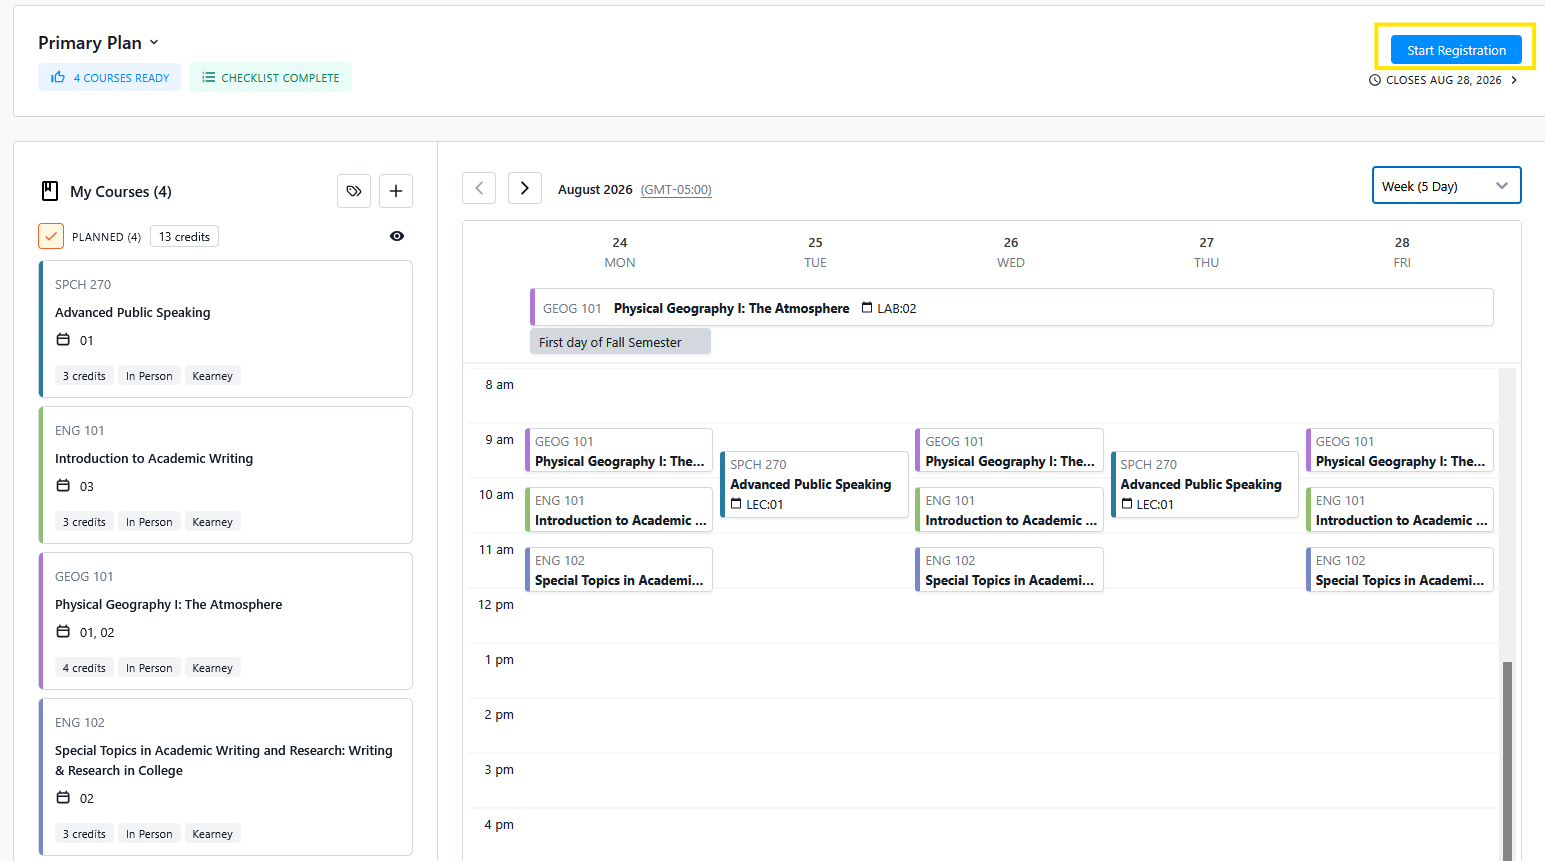
Example of Scheduler page after sections have been selected:
- Once courses have been added and course readiness indicates as ready, click “Start Registration” as similar to the steps above.
- Note, it is recommended that courses be added to the student plan prior to registration, as live course enrollment data can change and impact course availability and section selections.
Registration Steps for courses not placed in Plan:
Stellic Registration Video Tutorial